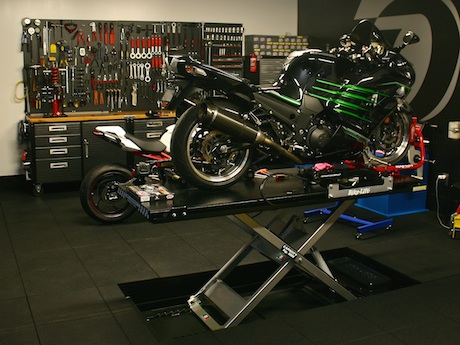
Before any ride, you should go over a pre-ride checklist to ensure that your bike is not only safe to ride, but also legal.
Did you know you can be fined for a faulty motorbike taillight? It is a requirement that all motorists check their vehicles before they ride/drive them. You are responsible for any faults such as worn tyres, faulty lights or missing registration sticker (if required in your jurisdiction). Claiming you did not know the rego sticker or number plate fell off is no excuse. You should have checked it was loose before riding.
But how many times do you check your motorbike before you go for a ride? Not only is it a legal requirement, but it could also save your life. A quick check might find that the brake lever has no pressure. Better to find out while it’s sitting in your garage than when you get to the bottom of your hill and the brakes fail.
Checking your motorbike after a ride is also a good idea that may save some inconvenience. If you have a slow leak in your tyres, it’s best to find out after your ride than the next morning when you go to hop on your bike to commute to work and discover you have a flat tyre.
I recently observed a Honda Australia Rider Training learners course for an article and picked up their motorbike checklist which I have combined with my own list. It’s pretty comprehensive checklist and obviously with a new bike it’s not necessary to do all the checks all the time.
PRE-RIDE CHECKLIST
- First on your checklist should be your number plate and registration sticker (if required) are still firmly fitted and clearly visible. That is, they aren’t smeared with mud or haven’t vibrated around so that it is obscured by, say, the chain guard. Check the legal requirement for placement.

 Check all levers
 - Go around the motorbike and look for any oil, water or fluid leaks. Check the radiator and engine hoses for telltale white marks which indicate a loss of lubricant. Wipe your finger over the exposed section of the forks checking for oil which could indicate broken fork seals. Also manually grab and shake various parts of your bike to see that they haven’t vibrated loose, such as windscreens, chain guard, rear racks, etc. Just give the bike a basic once over with your eyes and hands.
- Check the throttle, brake lever/pedal and clutch lever for a bit of free play. They should have a little, but not a lot. If the throttle doesn’t move a bit, then it is adjusted too tight and when you turn the handlebars from side to side it will actually rev the motorbike, which is not good when you are turning a corner. Make sure the brake lever/pedal activate the brake light before they start to engage the cable. This means the brake light will come on before you actually activate the brakes, therefore giving people behind you plenty of warning.
- While pondering the brakes, check the lever tension. When you hit the resistance point the lever or pedal shouldn’t keep moving. If it does, then your pads are worn out or there is a leak in the hydraulics. Check the brake pad width regularly by sight – front and back – and by feel. If there is a ridge, they are wearing out. Pads take a long time to wear out, so if the lever starts to lose pressure, it may be a leak. Either way, take your motorbike to a mechanic to have the brakes checked. Don’t just top up the brake fluid. That just disguises a leak or worn pads. If your brakes are not hydraulic, check that the cables aren’t worn, frayed or buckled. If you have drum brakes, check the wear indicators on the end of the cable (refer to the manual).
- There are other fluids you can also check such as clutch and radiator coolant. These can often be sealed units, so refer to your manual. Look for signs of leaks. It also pays to check fuel, either on the gauge or with a quick look in the tank. You don’t want to run out before you get to a service station.
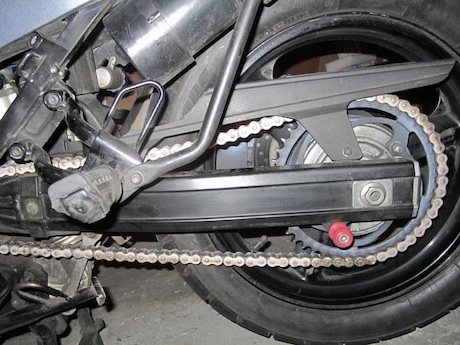
- Check the chain tension. There are sometimes indicators for the length of slack on the swing arm or chain guard. If not, they should be in your manual. Also check the front and rear sprocket for any wear or damage to the teeth.
- Tyre pressures should be checked when they are cold as heat increases pressure in the tyres. Check your manual or the chain guard for the recommended cold tyre pressures. Get an analogue pressure monitor as digital ones may be convenient, but they can quickly lose calibration and give false readings. Also check your tyres for wear. Most tyres have wear indicators, but the general rule is tread must be 1.5mm deep at the shallowest or most-worn point. Also check for any foreign objects. A nail can lodge in a tyre, but still not puncture it. However, it can cause a slow leak or suddenly shift and blow the tyre.
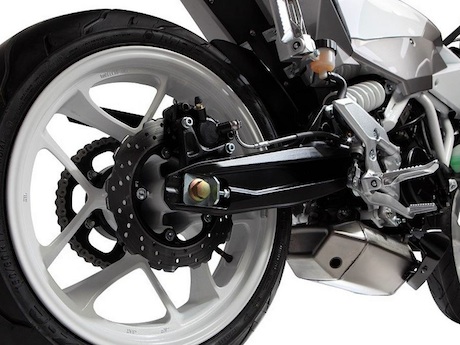 Check tyres, wheels and brake disc pads
 - While looking at the tyres, also check the rims for dings or cracks and on spoked wheels check the spokes. You can do this by gently hitting them with a small spanner. A loose spoke will have a lower, deader sound. Tighten any loose spokes but make sure you aren’t just compensating for a dented rim.
- Next, check the electrics. Switch on the ignition and check headlight on low and high beam, indicators front and back, taillight and also check the brake light off both the lever and pedal. Try the horn as well. Then start the bike to see if the battery is fully charged or whether it labours to spark the engine into life. Old batteries may require a distilled water top-up, but most batteries are sealed these days. If it’s faulty, it isn’t going to get any better, so replace it now before it leaves you stranded.

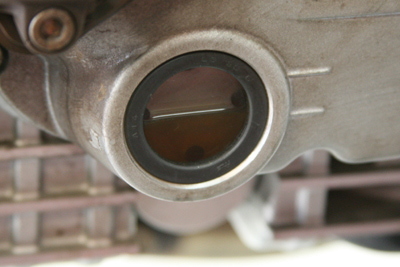 Check the oil level on the sight glass
 - Let your motorbike run for about a minute to warm the engine oil, then switch it off and check the oil level. Don’t do it when the engine is cold as the level reading will be lower than expected as oil will still be up in the engine. Put the bike on its centre stand or tip it as close to straight as possible. A bike leaning on its side stand will give a false reading.
- Check your mirrors are clean and properly positioned. You can do this earlier, tightening a loose mirror with a spanner. However, while you’re walking around your bike you can easily bump them out of alignment, so check them again. Now you’re ready to ride.
POST-RIDE CHECKLIST
- Give your motorbike another once-over with your eyes and hands as you did before the ride, checking for anything that has come loose, broken or started leaking. Since you’ve just been riding, you should have noticed if the levers or throttle feel loose or sticky.
- While the bike is still warm from the ride, now is a good time to lubricate the chain. This will allow the oils to stay viscous and soak into the chain rather than coagulating in globs only to fling off when you next ride. When spraying lube on a chain, point the nozzle forward toward the front sprocket spraying the top side of the chain as it comes out the bottom of the sprocket. This will ensure no slippery lubricant oversprays on to the tyre. Spin the tyre with your other hand and spray at least one full chain rotation. Also check the chain tension again.
- When the engine has cooled, give your bike a wash. It’s not only good to have a clean bike to take out next time, but it also prevents the built-on grease and grime from corroding paint and chrome. It also allows you time manhandling your motorbike which is often when you find a loose bolt, leaking reservoir or broken light.
Have I missed anything? You tell me. What else would you check before or after a ride?